
TL;DR:
- A full bathroom remodel typically moves from bathroom renovation planning and design to demolition, rough plumbing and electrical work, waterproofing, tile installation, and final fixture installation. The exact order can change based on the scope of work, but planning the layout, ordering critical materials early, and completing each stage before the work that depends on it helps prevent delays and expensive rework.
10 Bathroom Renovation Steps: The Complete Remodeling Process
The steps of a bathroom remodel follow a general construction sequence. The exact order can change based on the scope of work, but a full remodel typically moves from bathroom renovation planning and design to demolition, rough plumbing and electrical work, waterproofing, tile installation, and final fixture installation. A cosmetic bathroom update may only involve paint, flooring, and a new vanity. A complete bathroom renovation that includes a walk-in shower, new plumbing fixtures, or layout changes requires more planning and coordination between trades. Here are the 10 bathroom renovation steps homeowners can generally expect during a full remodel.
1. Set Your Bathroom Remodeling Budget
Start with the total amount you are prepared to spend on the bathroom remodel, as this is probably the most important part of the bathroom renovation planning process. Your budget needs to cover labor, materials, plumbing fixtures, tile, cabinetry, permits, and any work discovered after demolition.
It is also a good idea to leave roughly 10% to 20% of the project budget available for unexpected repairs. Bathrooms can hide water damage, leaking plumbing, damaged subfloor, and deteriorated framing. In older homes, demolition may also expose plumbing or electrical work that needs to be updated before the bathroom can be rebuilt. The age of the home and the size of the renovation should determine how much room you leave in the budget for unexpected work.
2. Finalize the Bathroom Design and Layout
The bathroom layout should be decided before construction begins. Determine the location of the vanity, toilet, shower, bathtub, lighting, electrical outlets, and exhaust fan. If the remodel includes moving plumbing fixtures, the new locations need to be reviewed before demolition and rough plumbing begin. Material selections and fixture locations are part of the design process because vanity dimensions determine where plumbing and electrical connections need to be placed, tile size affects the finished layout, and shower systems and plumbing fixtures may require specific valves, drains, or rough-in components inside the wall. Making these decisions early gives the plumber, electrician, tile installer, and bathroom remodeling contractor the information they need before their portion of the work begins.
Pro Tip: Give your contractor the manufacturer specifications for faucets, shower valves, drains, and other plumbing fixtures before rough-in work begins. Finished product photos do not provide the measurements needed to install concealed plumbing components.
3. Hire a Bathroom Remodeling Contractor and Review Permit Requirements
Bring a bathroom remodeling contractor into the project before every design decision is final. A contractor can review the proposed bathroom layout and identify construction issues that may affect the cost or scope of work. Moving a toilet, expanding a shower, or removing a wall can involve more work than the finished design makes apparent. Permit requirements can apply to plumbing, electrical, and structural changes, depending on the municipality and the work included in the bathroom renovation. Before construction starts, confirm which permits are required and who is responsible for obtaining them.
4. Select and Order Bathroom Materials
Order critical bathroom materials before demolition begins. This may include the bathroom vanity, shower valve, faucets, bathtub, tile, shower system, drain, toilet, lighting, and specialty hardware. Not every product needs to be sitting in the bathroom on the first day of construction. However, the contractor should know that critical materials are available and that concealed components needed for rough-in work are on-site when required. Starting demolition before important materials are available can interrupt the remodeling schedule. A missing shower valve or backordered tile can stop the bathroom remodeling process until the correct material arrives. Inspect major materials after delivery. Tile should be checked for damage and correct quantities. Plumbing fixtures should be verified against the approved selections. Custom and special-order products should be confirmed before the existing bathroom is removed.
Pro Tip: Avoid scheduling demolition around an estimated delivery date for a critical material. Whenever possible, confirm the product has arrived and has been inspected first.
5. Demolish the Existing Bathroom and Inspect Hidden Areas
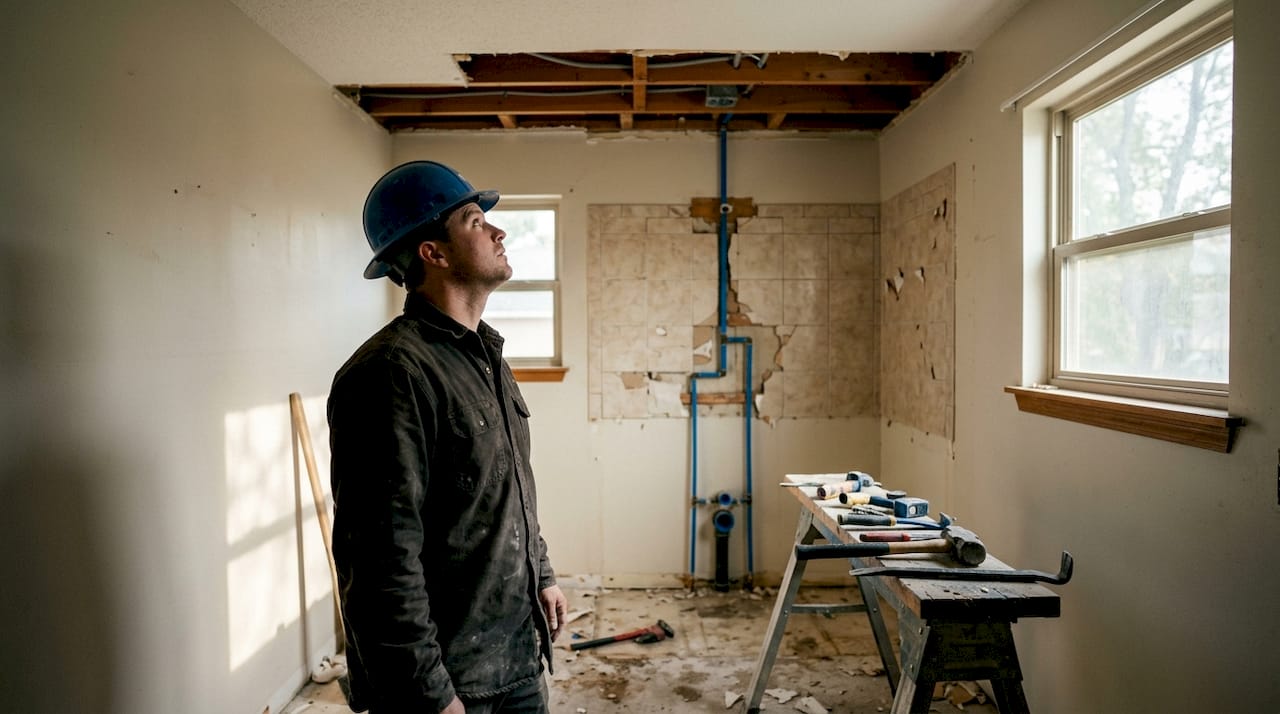
Bathroom demolition removes the existing finishes and fixtures included in the scope of work. Depending on the project, demolition may include the vanity, toilet, bathtub, shower, wall tile, floor tile, drywall, and flooring. Once these materials are removed, the contractor can inspect areas that were previously covered. This is when water-damaged subfloor, rotted framing, leaking pipes, failed shower assemblies, and previous repairs are often discovered. Older bathrooms may also contain plumbing or electrical work that needs attention before new materials are installed. Any problems found during demolition should be evaluated before the bathroom is closed back up.
6. Complete Framing, Rough Plumbing, and Electrical Work
After demolition and necessary repairs, construction begins on the new bathroom layout. Framing work is completed for walls, shower niches, benches, door openings, and other structural changes included in the bathroom design. The plumber then completes rough plumbing for drain lines, water supply lines, shower valves, and other concealed plumbing components. Electrical rough-in includes wiring for bathroom lighting, GFCI-protected receptacles, switches, exhaust fans, and other electrical features included in the project. Rough plumbing and electrical work is completed before concealed work is covered, with required inspections taking place at the appropriate stages. Changes become more difficult once drywall, waterproofing, tile, and cabinetry are installed. Fixture locations and rough-in measurements should be checked carefully during this stage.
7. Prepare and Waterproof the Shower and Wet Areas
Waterproofing is one of the most important stages of a bathroom remodel, particularly when the project includes a tile shower. A properly built shower uses a complete water-management system behind the finished tile. Depending on the shower assembly, this may include a sheet membrane, liquid-applied waterproofing membrane, waterproof foam board, or another approved shower system. Modern shower assemblies use dedicated waterproofing components behind the finished tile. The waterproofing method should be installed as a complete system and according to the manufacturer’s requirements. Tile and grout are finished surfaces. They are not a substitute for a properly installed waterproofing system. This is also the time to confirm wall blocking for items that need additional support. Grab bars, floating vanities, shower glass hardware, and other heavy wall-mounted fixtures may require solid backing inside the wall. Installing blocking while the walls are open is much easier than modifying a finished bathroom later.
8. Install Shower Tile and Bathroom Flooring
Tile installation begins after the shower substrate and waterproofing system are complete. The tile installer plans the layout around grout lines, shower niches, corners, plumbing penetrations, and visible cuts. Tile layout is especially important with large-format porcelain tile and custom tile shower designs because small adjustments can affect the appearance of the entire installation. Tile installation comes after rough-in work and waterproofing in the bathroom remodeling order of operations. The exact installation sequence may vary. Some tile installers complete the shower walls before the shower floor. Others complete and protect the shower base while the wall tile is installed. The installation method should work with the waterproofing system, shower slope, drain, and tile layout. Bathroom floor tile or other finished flooring is also installed during this portion of the remodeling process, based on the material and remaining construction work. You can see examples of completed bathroom and tile projects in the Ready Renovations project gallery.
9. Install the Vanity, Toilet, Plumbing Fixtures, and Bathroom Accessories
Once the major finished surfaces are complete, the bathroom fixtures and finish components can be installed. The bathroom vanity and countertop are set in place. The sink and faucet are connected. The toilet is installed, and the plumber completes the shower trim and other plumbing fixture connections. Light fixtures, mirrors, towel bars, and bathroom accessories are installed during the finishing stages of the project. The installation order can change based on the products selected. For example, a custom bathroom vanity may need to be installed before the countertop company can take final measurements. The countertop must then be fabricated and installed before the sink and faucet connections are completed. The project schedule should account for the actual bathroom materials being used.
10. Complete Painting, Caulking, Final Adjustments, and the Punch List
The final stage of the bathroom remodeling process includes painting, trim work, caulking, adjustments, and touch-ups. Some painting may be completed earlier in the project, with the painter returning after fixture installation for final coats or repairs. Bathrooms should be painted with a coating suitable for the moisture and ventilation conditions of the room. Bathroom-rated paints are available in several finishes, and the appropriate product depends on the surface and room conditions. Final caulking is completed at applicable joints, transitions, and fixtures. The contractor then completes the bathroom remodeling punch list. Cabinet doors and drawers are adjusted, hardware is tightened, fixtures are checked, paint is touched up, and remaining cosmetic items are addressed. The project ends with a final walkthrough of the completed bathroom.
How Long Does the Bathroom Remodeling Process Take?
The bathroom renovation planning timeline depends on the size of the bathroom, the scope of work, material availability, permit requirements, and whether hidden damage is discovered during demolition. A bathroom remodel that keeps the existing layout may move faster than a project involving relocated plumbing, electrical changes, or a custom tile shower. The construction schedule also depends on trade coordination. Plumbers, electricians, inspectors, drywall installers, tile installers, painters, and countertop fabricators may all be involved at different stages of the project. A full bathroom remodel moves through distinct planning, construction, and finishing stages, and the total timeline can include material lead times and scheduled pauses between phases. This is why material selection and project planning happen before demolition. A well-planned bathroom remodeling process gives each trade the information and materials needed when their portion of the work begins.
| Phase | Typical Duration | Key Variable |
|---|---|---|
| Planning, design, and permits | 2–4 weeks | Design decisions and permit processing time |
| Material ordering and delivery | 2–12 weeks | Custom tile, vanities, fixtures, and specialty products |
| Demolition and assessment | 1–3 days | Hidden damage and unexpected repairs |
| Framing, rough plumbing, and electrical | 3–7 days | Layout changes, inspections, and trade scheduling |
| Waterproofing and wall preparation | 2–4 days | Shower system and installation requirements |
| Tile installation | 3–10 days | Tile size, layout, pattern, and shower complexity |
| Fixture and finish installation | 2–5 days | Vanity, countertop, plumbing fixtures, and accessories |
| Painting, caulking, and punch list | 2–4 days | Drying time, touch-ups, and final adjustments |
The planning and material ordering stages often take more calendar time than homeowners expect. Once demolition begins, the construction portion of a full bathroom remodel may take several weeks, depending on the work involved. Inspections, waterproofing requirements, cure times, countertop fabrication, and trade scheduling can also create normal pauses between stages.
Why the Order of Bathroom Renovation Steps Matters
Bathroom renovation steps are not completely interchangeable. Plumbing and electrical rough-in work needs to be completed before walls are closed. Shower waterproofing needs to be installed before tile. Concealed wall blocking needs to be added before drywall or tile covers the framing. The broad bathroom remodeling order of operations moves from planning and demolition through concealed rough-in work, waterproofing, tile, fixtures, and finish work. At the same time, there is no single construction schedule that applies to every bathroom remodel. Products, shower systems, custom fabrication, inspections, and the existing condition of the bathroom can change the order of individual tasks. The goal is not to force every bathroom renovation into an identical schedule. The goal is to plan the project so each stage is completed before the work that depends on it begins. Understanding the bathroom remodeling process makes it easier to follow the construction schedule, ask better questions, and understand what your contractor is working on at each stage of the renovation.
Bathroom Renovation Planning Key Takeaways
| Point | Details |
|---|---|
| Budget for unexpected work | Leave room in the project budget for hidden water damage, plumbing problems, damaged subfloor, and other issues discovered after demolition. |
| Finalize the layout early | Fixture locations affect plumbing, electrical work, framing, and material requirements. |
| Order critical materials before demolition | Shower valves, tile, vanities, fixtures, and specialty products can delay the project if they are unavailable when needed. |
| Use a complete waterproofing system | Tile and grout are finished surfaces and are not a substitute for a properly installed shower waterproofing system. |
| Plan around the actual materials | Custom countertops, vanities, tile, and plumbing fixtures can change the order and timing of individual stages. |
What Homeowners Should Know Before Starting a Bathroom Remodel
The smoothest bathroom remodels usually have one thing in common: most of the important decisions are made before construction starts. The layout is settled, major materials are selected, critical products are ordered, and the contractor understands the scope of work. The more decisions that are made before demolition, the fewer decisions have to be made while the bathroom is already torn apart.
A detailed contract also matters. A bathroom remodeling contract should clearly define the scope of work, payment schedule, project milestones, and process for written change orders. This gives both the homeowner and contractor a written reference when materials, project details, or the original scope are discussed during construction.
Material lead times are also easy to underestimate. A contractor can be ready to work, but the project may still slow down if the tile, vanity, shower valve, or countertop is not available. This is especially important when the bathroom includes custom products or materials that cannot be replaced with an off-the-shelf alternative without changing the design.
Homeowners should also expect some pauses during construction. Inspections, cure times, countertop fabrication, material staging, and trade scheduling can all create days when there is less visible progress. A well-managed bathroom remodel does not necessarily mean someone is working in the room every hour of every day.
Before hiring a contractor, ask them to explain the order of work and how they manage materials, inspections, and trade scheduling. You can also review a contractor’s completed work to get a better idea of the quality and types of projects they handle. The Ready Renovations gallery includes examples of completed remodeling projects.
Ready Renovations Handles Every Phase of Your Bathroom Remodel
A bathroom remodel requires planning and coordination from the first design decisions through the final walkthrough. Ready Renovations provides professional bathroom remodeling in Fraser, MI, with projects planned around the actual layout, materials, and scope of work involved.

Whether the project involves a new vanity and flooring, a walk-in shower, or a complete bathroom renovation, each stage needs to be coordinated with the work that comes before and after it. Visit the Ready Renovations website to learn more about the company or view the completed project gallery to see examples of previous remodeling work.
FAQ
What is the first step in a bathroom remodel?
The first step is setting the project budget and defining the scope of the remodel. The layout and major fixture locations should also be reviewed before demolition and rough-in work begin.
Should bathroom materials be ordered before demolition?
Critical bathroom materials should be selected and ordered before demolition whenever possible. Shower systems, tile, vanities, and other major materials can create delays when they are not available before construction reaches the stage where they are needed.
Does a bathroom remodel require permits?
Permit requirements depend on the municipality and the work included in the remodel. Plumbing, electrical, and structural changes may require permits and inspections. Confirm the requirements for the project before construction begins.
How long does a full bathroom remodel take?
The construction portion of a full bathroom remodel may take several weeks, but the complete timeline depends on the scope of work, permits, material availability, inspections, hidden damage, custom fabrication, and trade scheduling.
Is tile and grout waterproof?
Tile and grout are finished surfaces and should not be treated as the primary waterproofing system. A tile shower needs a properly installed water-management system behind the finished tile.
Why does the order of bathroom renovation steps matter?
Some stages need to be completed before the work that depends on them can begin. Rough plumbing and electrical work are completed before walls are closed, waterproofing is installed before tile, and concealed wall blocking needs to be added before framing is covered.