
TL;DR:
- Budget kitchen upgrades under $6,000 focus on cosmetic changes like paint, hardware, and backsplashes, which offer high impact. Proper surface prep, such as degreasing cabinets with TSP, is essential for long-lasting results. Styling with plants, open shelving, and decor can improve space appearance without significant expense.
A budget kitchen transformation is any upgrade that delivers visible, lasting improvement for under $6,000 without touching load-bearing walls or plumbing. Painted cabinetry, hardware swaps, and peel-and-stick backsplashes are the three highest-impact moves in this category. Search interest in painted cabinetry in moody greens, sage, and warm navy has surged 340% since early 2025. That number tells you where homeowners are putting their energy. The examples of budget kitchen transformations below show exactly what is possible, from a $300 weekend project to a $6,000 full DIY overhaul.
1. Examples of Kitchen Transformations on a Budget: Cabinet Repainting
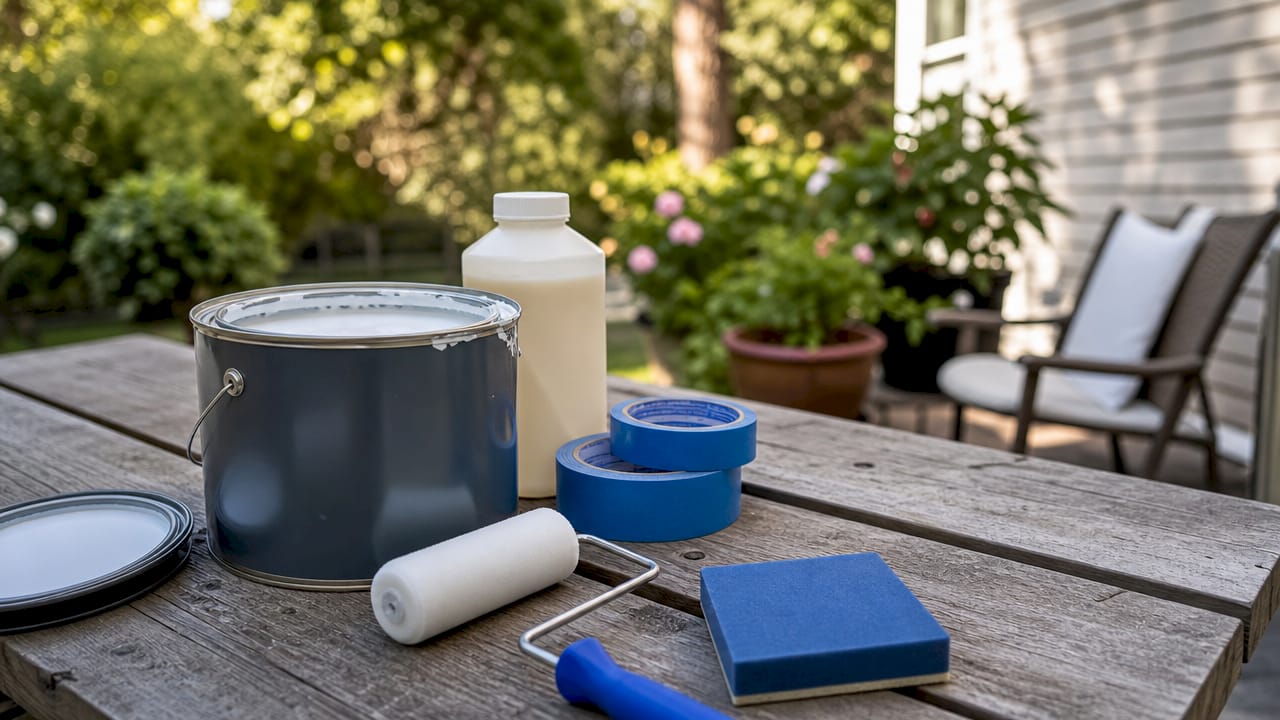
Cabinet repainting is the single highest-return upgrade in any affordable kitchen makeover. Cabinets cover more visual surface area than any other element in the room. Repainting them in a trending color like sage green or warm navy costs a fraction of replacement and delivers a result that reads as a full renovation.
The key is surface prep. Degreasing with TSP (trisodium phosphate) before painting removes cooking oils and residue that cause paint to peel within months. Standard household cleaners leave a film that prevents adhesion. After degreasing, sand lightly, apply a bonding primer, and finish with a water-based alkyd paint for durability.
Pro Tip: Paint one cabinet door first and live with it for 48 hours before committing to the full set. Lighting changes color dramatically between morning and evening.
2. Hardware swaps for an instant modern look
New cabinet hardware is the fastest inexpensive kitchen upgrade you can make. Swapping pulls and knobs costs $12–$35 per set and takes a single afternoon with a screwdriver. The visual shift from dated brass to matte black or brushed nickel reads as a complete style update.
Match your hardware finish to one other metal in the kitchen, such as your faucet or light fixture. Mixing three or more finishes creates visual noise. Stick to two, and the room feels intentional rather than assembled from leftovers.
3. Peel-and-stick backsplash tiles
A peel-and-stick backsplash is the most reversible upgrade in budget-friendly kitchen ideas. Installation costs $25–$60 for a standard backsplash area, and the tiles come off cleanly without damaging the wall beneath. That makes them ideal for renters and homeowners who want to test a look before committing.
Application quality depends on surface temperature. Using a heat gun during installation presses the adhesive firmly into the wall and eliminates bubbling. The same heat gun makes removal clean and damage-free. Subway tile patterns and marble-look sheets are the most popular choices for small budget kitchen designs right now.
Pro Tip: Clean the wall with isopropyl alcohol and let it dry completely before applying any peel-and-stick product. Moisture is the main cause of early lifting.
4. Appliance resizing to open up the room
An oversized refrigerator in a narrow kitchen is one of the most overlooked problems in kitchen renovation on a budget. Replacing a standard-depth fridge with a counter-depth model can visually expand the room more than most cosmetic changes. The fridge no longer juts into the walking path, and the kitchen feels wider immediately.
This upgrade costs more than paint or hardware, but the spatial payoff is significant. If budget is tight, prioritize this swap after completing the cosmetic work. The combination of fresh paint, new hardware, and a properly sized appliance creates a kitchen that looks professionally redesigned.
5. Contact paper and grout painting for surface updates
Contact paper covers worn countertops, shelf interiors, and even cabinet faces for under $30 a roll. The material has improved significantly. Current versions mimic marble, butcher block, and concrete with enough realism to fool a casual observer. This is one of the most practical DIY budget kitchen projects for homeowners who cannot afford new countertops yet.
Grout painting is the companion move for tired tile. A grout pen or brush-on grout paint costs under $20 and turns dingy gray lines bright white or charcoal in an hour. Trying paint-based fixes first on surfaces like flooring or backsplash reduces risk. If the result does not work, the cost to pivot is minimal compared to a full replacement.
6. Under-cabinet and puck lighting
Lighting is the most underused tool in creative kitchen transformations. Under-cabinet lights eliminate the shadow that falls across countertops when overhead fixtures are the only source. That shadow makes prep work harder and the kitchen feel darker than it actually is.
Battery-operated LED puck lights require no wiring and cost under $30 for a set of six. Plug-in LED strip lights are slightly more involved but deliver a cleaner look. Either option adds warmth and depth to the room without touching the electrical panel. The effect is especially strong in kitchens with dark lower cabinets.
7. Open shelving and styled storage
Removing one or two upper cabinet doors and styling the shelves behind them is a low-cost move that adds personality to any kitchen. The cost is essentially zero if you already own the cabinets. A can of paint, a few brackets, and some curated items complete the look.
Styling with wood cutting boards, ceramics, and artwork on existing shelves also conceals flaws and lets you save for bigger renovations later. A chipped cabinet edge disappears behind a well-placed cutting board. A dated tile backsplash recedes when the eye is drawn to a colorful ceramic bowl in the foreground.
8. Greenery and plants for warmth
Plants are the cheapest styling upgrade in any budget kitchen makeover. A pothos on a shelf, a small herb garden on the windowsill, or a trailing vine above the cabinets adds texture and life that no paint color can replicate. Simple updates like adding greenery take a single afternoon and yield better visual return than many larger projects.
Choose plants that tolerate low light and humidity if your kitchen lacks a large window. Pothos, snake plants, and ZZ plants all thrive in kitchen conditions. A cluster of three plants at different heights creates more visual interest than one large plant alone.
9. Window treatments and decluttering
A new window treatment changes the perceived size and brightness of a kitchen for under $50. Roman shades in a linen or cotton fabric soften the room. Cafe curtains add a bistro feel without blocking light. Either option modernizes a dated window frame without touching the structure.
Decluttering delivers the same visual impact as a renovation for free. Clearing the countertops of appliances you use less than once a week makes the kitchen feel larger and cleaner immediately. Store those items in a cabinet or pantry and bring them out only when needed.
How to prioritize your budget kitchen upgrade
The order in which you tackle upgrades determines how far your money goes. Cosmetic improvements like paint and hardware deliver the highest visual return per dollar. Structural changes like new flooring or countertops cost more and take longer to show results.
Homeowners can make major aesthetic transformations for as little as $300 with cabinet repainting, hardware upgrades, and backsplash refreshes. More extensive DIY remodels run $2,000–$6,000 when floor and backsplash tiling are included. That range gives you a clear framework for setting expectations before you spend a dollar.
| Upgrade | Typical cost | Effort level | Visual impact |
|---|---|---|---|
| Cabinet repainting | $100–$400 | High | Very high |
| Hardware swap | $30–$150 | Low | High |
| Peel-and-stick backsplash | $25–$60 | Low | High |
| Contact paper countertops | $20–$60 | Low | Medium |
| Appliance resizing | $500–$1,500 | Medium | High |
| Open shelving | $0–$100 | Medium | Medium |
| Lighting upgrade | $20–$80 | Low | High |
Start with paint and hardware. Those two moves cost the least, require no special skills, and set the visual tone for every upgrade that follows. Add backsplash and lighting next. Save appliance resizing and structural work for last, once you know the direction the kitchen is heading.
Pro Tip: Photograph your kitchen before any upgrade. Renovation fatigue makes it hard to see progress. A before photo reminds you how far the room has come.
Materials and tools for DIY kitchen projects
The right materials make the difference between a DIY project that lasts five years and one that fails in five months. For cabinet painting, the material stack is: TSP degreaser, 220-grit sandpaper, a bonding primer, and a water-based alkyd topcoat. Each layer serves a specific purpose. Skip any one of them and the finish degrades faster.
For peel-and-stick tile work, you need:
- Isopropyl alcohol for surface cleaning before application
- A plastic squeegee to press tiles flat and remove air pockets
- A heat gun or hair dryer to improve adhesion and assist removal
- A utility knife for clean cuts at edges and outlets
- A level to keep rows straight across the wall
For grout painting and contact paper, the tool list is simpler. A small foam brush, painter’s tape, and a sharp craft knife handle most of the work. The heat gun application technique applies here too. Warming contact paper before pressing it down reduces wrinkles and air bubbles significantly.
Pro Tip: Buy 10% more peel-and-stick tile than your measurements require. Cuts and mistakes eat into your supply faster than expected, and dye lots vary between batches.
Creative styling tricks to elevate your budget kitchen
Styling is the final layer of any affordable kitchen makeover, and it costs almost nothing. The goal is to direct the eye toward what looks good and away from what does not.
- Wood cutting boards propped against the backsplash add warmth and hide dated tile
- Ceramic canisters in a cohesive color palette replace cluttered countertop items
- Framed art or a small chalkboard on an empty wall fills dead space with personality
- A woven or jute rug in front of the sink softens hard floors and adds texture
- Matching dish towels hung from the oven handle create a pulled-together look for under $15
Decorative everyday items can mask kitchen flaws effectively, allowing you to make incremental improvements over time. You do not need to fix everything at once. A well-styled kitchen with one dated element reads better than a half-renovated kitchen with no styling at all.
Reorganizing what is already in the kitchen costs nothing and improves both function and appearance. Group similar items together. Store rarely used appliances out of sight. Clear the top of the refrigerator completely. These three moves alone make most kitchens feel significantly more organized and spacious.
Key Takeaways
Budget kitchen transformations deliver the most value when you start with paint and hardware, then layer in lighting, backsplash, and styling before committing to structural or appliance changes.
| Point | Details |
|---|---|
| Start with paint and hardware | These two upgrades cost under $500 combined and set the visual direction for the entire kitchen. |
| Use TSP before painting cabinets | Degreasing with trisodium phosphate is the single most important prep step for a durable finish. |
| Peel-and-stick tiles are reversible | At $25–$60, they let you test a backsplash look without permanent commitment. |
| Styling conceals flaws | Wood boards, ceramics, and plants redirect the eye and buy time for bigger upgrades. |
| Prioritize cosmetic before structural | A $300 cosmetic refresh delivers faster visible results than a $2,000 structural project. |
What I have learned from budget kitchen projects
Most homeowners I work with underestimate how much a single well-executed upgrade changes the feel of a kitchen. They come in expecting to need everything replaced. Then they repaint the cabinets and suddenly the dated hardware is the only thing that bothers them. Then they swap the hardware and the backsplash becomes the focus. The kitchen improves in stages, and each stage costs less than they feared.
The mistake I see most often is skipping surface prep to save time. A cabinet paint job done without TSP degreasing looks fine for three months. Then it starts chipping at the edges, and the homeowner concludes that painting cabinets does not work. It does work. The prep is what makes it work.
My honest recommendation is to start with the completed project gallery at Myreadyrenovation before you buy a single can of paint. Seeing finished kitchens gives you a realistic target and helps you identify which specific element is making the biggest difference in each room. Most of the time, it is the cabinets. Sometimes it is the lighting. Rarely is it the countertops.
Patience matters more than budget in DIY kitchen renovation. A homeowner who takes six months to repaint cabinets properly, swap hardware, and add lighting ends up with a better result than one who rushes a full weekend overhaul. Slow, deliberate work shows in the finish.
— Eric
Ready Renovations can help you plan your kitchen upgrade
Knowing where to start is often the hardest part of a kitchen renovation on a budget. Myreadyrenovation works with homeowners in Fraser, MI, to identify which upgrades deliver the most impact for their specific kitchen layout and budget.
Whether you want professional cabinetry work or a consultation to map out a phased DIY plan, the team at Myreadyrenovation brings hands-on experience to every project. Visit the kitchen remodeling page to see service options and request a free estimate. A short conversation with a professional can save you from costly missteps and point you toward the upgrades that will matter most in your specific space.
FAQ
How much does a budget kitchen transformation cost?
Cosmetic upgrades start at $300 for paint, hardware, and a backsplash refresh. Full DIY remodels including flooring and tiling run $2,000–$6,000.
What is the highest-impact low-cost kitchen upgrade?
Cabinet repainting delivers the most visible change per dollar. Search interest in painted cabinetry has grown 340% since early 2025, confirming it as the top priority for budget-conscious homeowners.
Can peel-and-stick backsplash tiles damage walls?
Peel-and-stick tiles remove cleanly when a heat gun is used during removal. They are safe for most painted drywall and tile surfaces when applied and removed correctly.
Do I need special tools to repaint kitchen cabinets?
The most important tool is a TSP degreaser, not a brush or roller. Proper degreasing before painting is what separates a finish that lasts years from one that chips within months.
What styling items give the best return in a budget kitchen?
Wood cutting boards, ceramic canisters, and plants deliver the highest visual return for the lowest cost. These everyday items conceal flaws and create a styled look while you save for larger upgrades.